The first step in baking most dishes is to preheat the oven. But what if we do not do that? What will happen if we bake sourdough bread in a cold oven i.e. without preheating it prior to baking. I was surprised to read about it. If there is one thing about baking sourdough bread, it is to bake it at the highest temperature. Most bakers will advice you to preheat the dutch oven before transferring the dough to it. That is to ensure the highest possible temperature for the dough to become bread. So this seemed very unusual. So, I had to try it. What do you think would happen to the resulting loaf? Let’s find out!
Of singing loaf and blisters in the crust
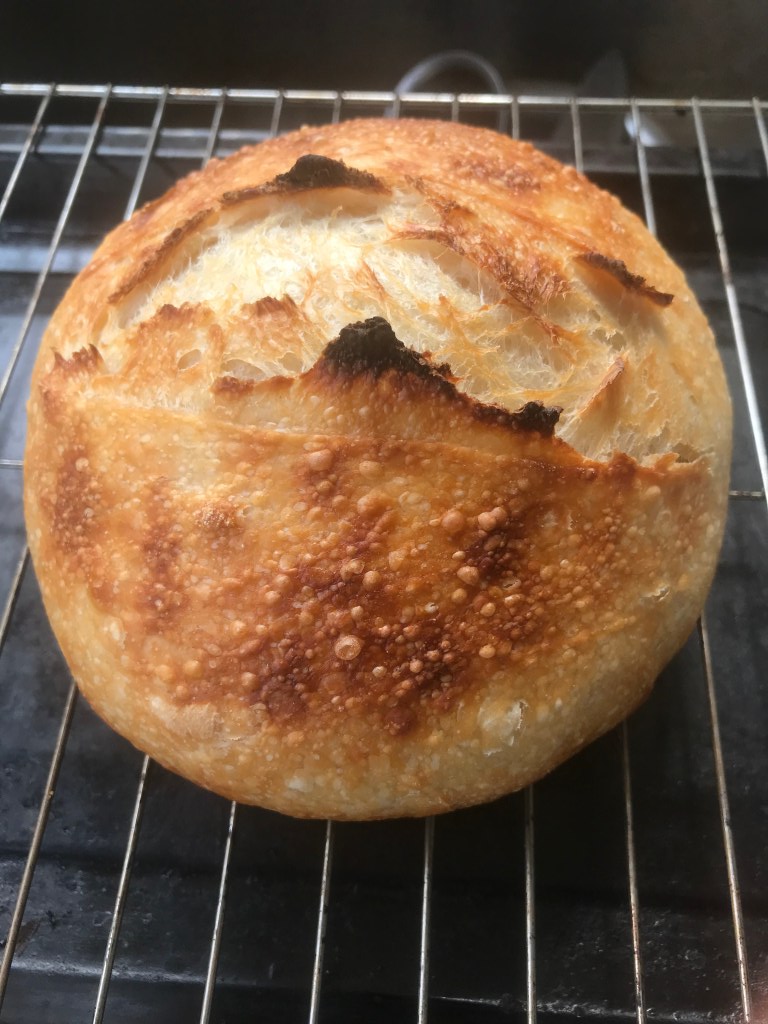
This loaf was quite a landmark in my baking journey. It got blisters on the crust ie the small bubbles you see on the crust. It is also my first loaf to sing. In sourdough terms, a loaf is said to sing if you can hear the crackling sound as soon as it is taken out of the oven. The crackling is mainly due to the difference in temperature of the sourdough bread and the ambient temperature in the room. I was so excited to hear it and I felt like I unlocked the next achievement level! It does not happen every time though.
The usual factors that enable the singing loaf is the difference in temperatures and hydration of the dough. The cooler the room the difference in temperature with the bread will be higher. So the chances of the loaf signing will also be more. If the water content in the dough ie hydration is more then the chances of the bread signing will also be more.
Of course, I have a recording of it. Check it out!
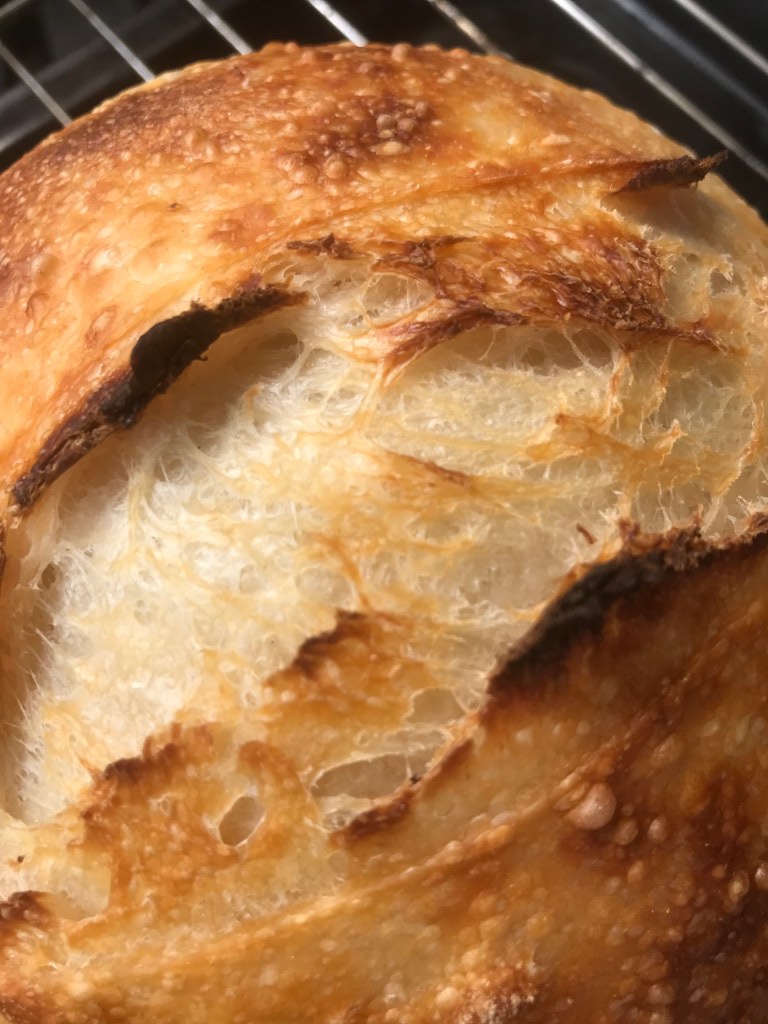
Blisters in the crust of a sourdough bread are also seen as a sign of a good loaf. In the famous San Francisco sourdough breads, blisters are usually a given. You will hardly find sourdough loaves there without the blisters on the crust. Honestly I was quite surprised to find the cold oven baking led to blisters in the crust. I think they look lovely. The blisters occur because the cold dough is transferred to the oven and the steam generated in the oven causes blisters. You will not find blisters if the dough is at room temperature before you transfer it to the oven. The chances of blisters are also low if you do not cover the dough while baking. The covered dough interacts with the steam created because of the closed dish and that causes the blisters.

Another way to get blisters on your loaf is to brush the cold dough with water before baking it. That also gives rise to steam and hence the blisters. Do try these tips and let me know how they turned out.
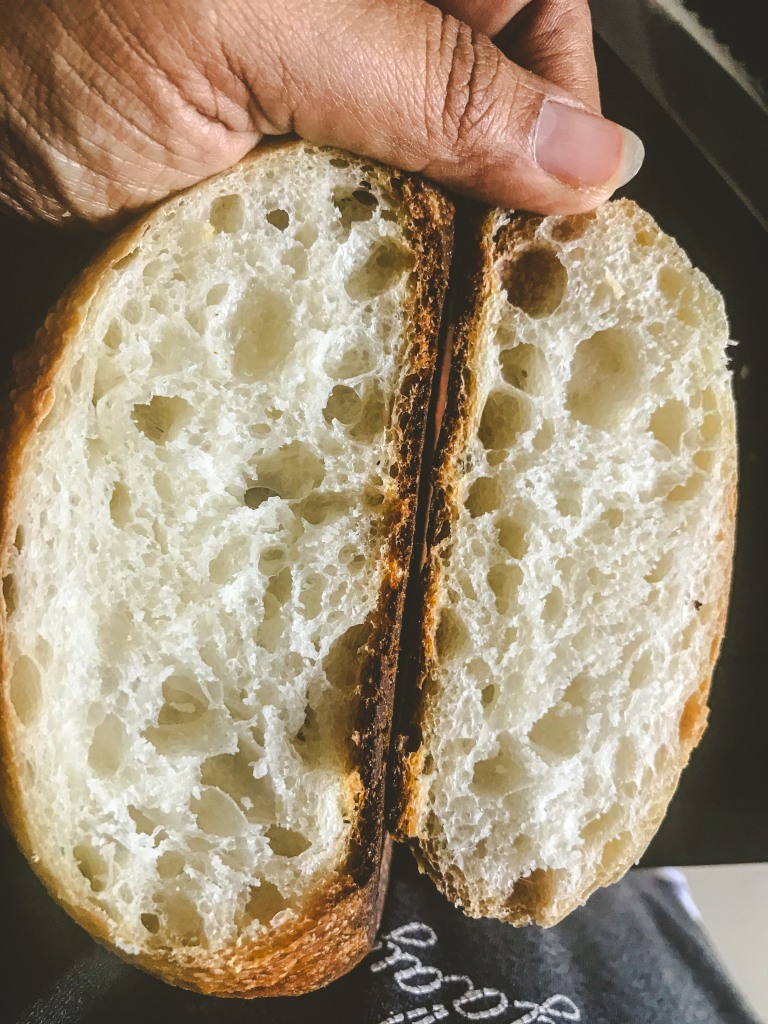
This loaf is my usual sourdough recipe with 20% starter but I increased the water to 78% and baked it fully covered without any time to bake uncovered. Since it is a cold oven I gave it more time to be baked closed to ensure a good oven spring. I have had one of my best oven springs and open crumb with this cold oven baking. Sounds unbelievable but it is so true !!!
For other sourdough recipes you can check out the Sourdough bread with lamination or Sourdough bread with minimal starter. If you find sourdough baking overwhelming then take the first step with baking with poolish. This easy and beautiful Ciabatta with poolish is just the right place to start.
PIN IT FOR LATER
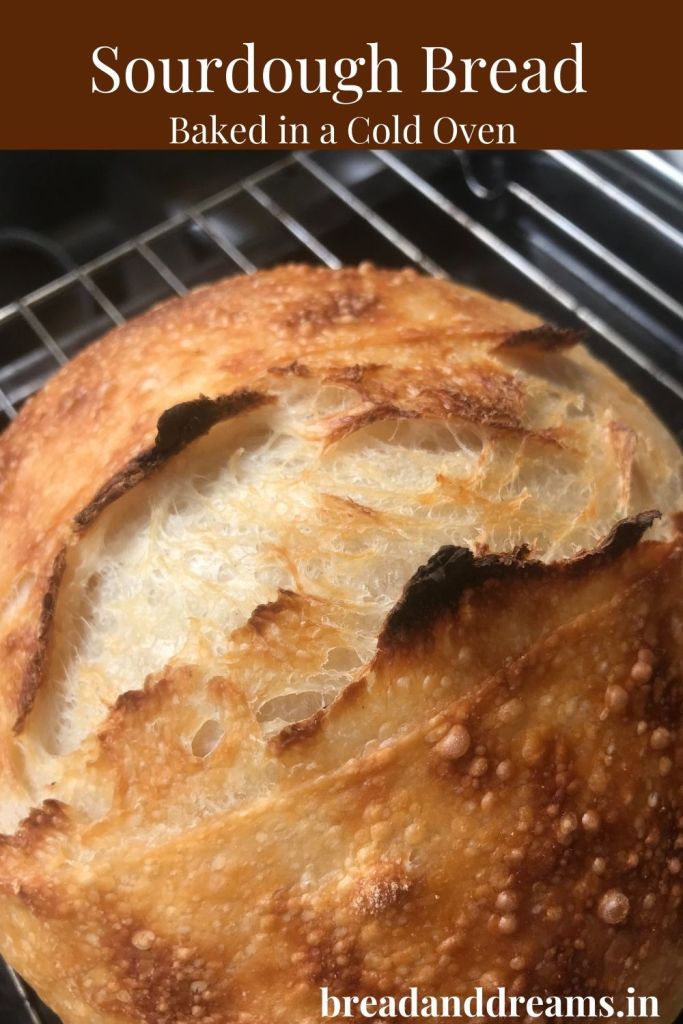
Sourdough bread in cold oven

An easy and tasty sourdough bread baked in a cold oven without any preheating.
For the sourdough starter
- 10 gms Unfed starter
- 20 gms All purpose flour
- 20 gms Water
For the bread dough
- 250 gms All purpose flour / Bread flour
- 195 gms Water
- 50 gms Sourdough Starter
- 8 gms Salt
Take the unfed starter in a transparent jar. Add the flour and water to it and set it aside till it doubles in volume. It should take arounf 3-4 hours
In a large bowl, mix the flour and water for the bread dough. Ensure no dry flour remains and cover it. Set it aside for atleast 2 hours to ensure the dough is supple and ready for the starter
Add the active and bubbly starter to the bread dough mix along with the salt. Mix well to incorporate the starter in the bread dough. Cover and set aside for 30 minutes
Use any method to strengthen the dough and develop the gluten. I prefer to use coil fold method but you can use stretch and fold too. See the video for the coil fold method.
Perform 4 rounds of coil fold with a 30 minute interval after every round. The entire process should take around 2 hours. Cover and set aside
Once the coil fold is complete, set the dough aside till it doubles in volume. It should take around 4 hours at 22C-28C
Once the dough doubles in volume, transfer it to a lightly floured surface. Stretch and fold it to form a tight dough ball.
Transfer the dough ball to a banetton. Cover and set aside in the refrigerator for around 12 hours. The volume of the dough will rise significantly
Take out the dough from the refrigerator and transfer it to a dutch oven or any oven safe dish. Score /slash the top of the dough with a sharp blade once or twice. This ensures the steam has a route to escape the loaf without spoiling its shape.
Cover and bake the loaf at 230C for 50 minutes.
Take out the loaf and cool it completely on a wire rack. Do not slice the loaf till it is fully cool. It should take around 2hours.


That’s a great detail that you shares. Now my curiosity antenna is raising and wanted to test it immediately. I would try making this as I love San Francisco Sourdough breads
LikeLike
Sowmya, you have left me speeches! I have always been a fan of your breads, but this one takes the cake. Wow! Simply wow!
Loved those blisters and the sizzling or should I say singing sound. It’s a joy to see such creations . Kudos, you need a big hug.
LikeLike
How wonderful would a bake be when it sings for you while moving out of the oven! Marvellous… I am so so piqued and I have to bake something with sourdough very very soon…
LikeLike
Hee how can I forget this bread? It was for the first time i heard that bread sings and I did not understand what that milestone was but was so very happy for you! 😀
Love the breads you bake I hope I can learn from you soon.
LikeLike
That’s a lovely note to read in the morning 😀 come over and we can bake all day!
LikeLike
What the heck is a “loaf signing”?
LikeLike
I have described the singing in the post and also posted a video. A loaf Singing is just the buzz like sound that comes from the loaf as soon as it is taken out of the oven. This happens if the crust is hard and contracts as the bread cools.
LikeLike
I am down for the cold bake. My loaves sing more when I go above 75% hydrations but I’ve always baked at 465F 20min lid on, 25 lid off on the cast iron Dutch and that’s a 30 min warm up. And never have I tried straight out of the fridge. Everything I’ve been taught has been room temp. Also, a light water spray from a small bottle hand sprayer directly atop the loaf seems to provide me some good blisters. “She’s blinded me..with cold loaf science”
LikeLike
That’s interesting. I have always baked straight from the fridge. Works beautifully. And leaving the lid on for 30 mins or more gives me a better rise
LikeLike
Ok, I was able to make a 1000g batch of dough for two loaves and was on a time table to be able to bake one traditionally and the second with the cold oven method. Here’s what able to record for the differences.
1) I got good oven spring from both however I had a larger rise from the 6hr room temp proof trad bake than the 12hr overnight chilled loaf.
2) The crust on both loaves was thin and crispy. The traditional got more color and char on the ears and was more crispy. It really popped up and was closer to the top of the oven once I removed the dutch oven cover. The cold loaf after 50 min covered needed a few more minutes after with the lid off to brown out to my preference.
3) The crumb on the cold loaf felt a little more moist than the trad. Taste of both, no diff.
4) Verdict ? There’s advantages to both methods. Cold Oven Method works and it works well. After this test I will absolutely incorporate this style of baking into the playbook.
Thank you Sowmya for dropping this new method on us.
LikeLike
That is a wonderful analysis. One key reason I moved to baking the loaf directly from the fridge is the tropical weather here. I would end up over proofing it at room temp and so the chilled loaf worked out better. After reading all that you have done I am tempted to give the room temp bake another shot. Will keep you posted. It’s wonderful exchanging notes with you!
LikeLike